

Sentry Mode is a great feature available with Tesla vehicles that are equipped with cameras that can automatically record data based on detection of events. This has been beneficial for many owners that have had their cars vandalized. We are going to enable this on my Tesla Model 3 and use a little bit of PowerShell to help us.
According to the Tesla documentation, we need a drive formatted with FAT32 and a directory in the root called “TeslaCam”.
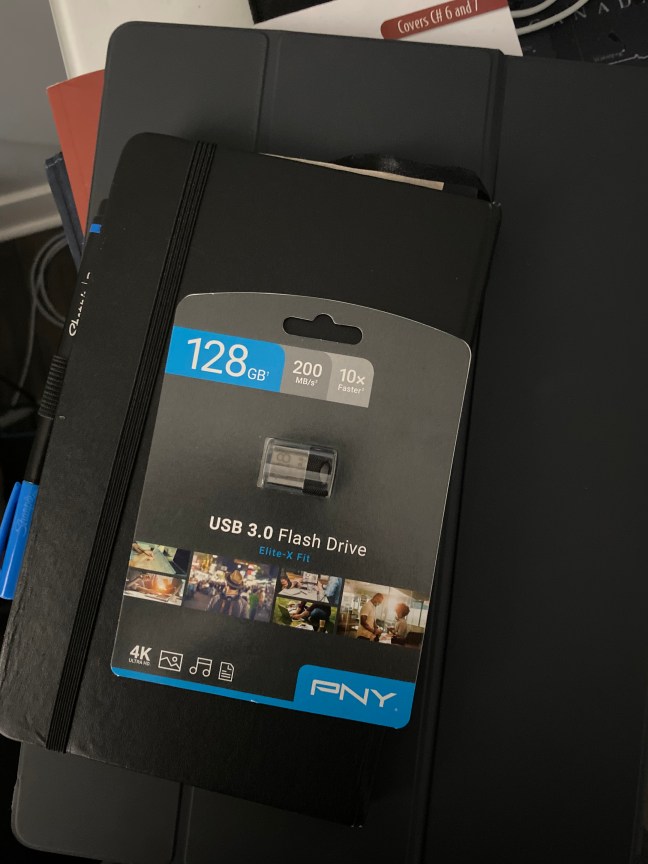
I bought this stubby PNY 128GB USB 3.0 disk, but the USB ports are only USB 2.0, so it is a bit overkill. In addition, Tesla suggests that a minimum speed of 4MB/second is required and this drive works well in excess of that speed. I liked it to be stubby so that it isn’t easily identified:
SOURCE (Model 3 Owners Manual, Page 135): https://www.tesla.com/sites/default/files/model_3_owners_manual_north_america_en.pdf
I opened PowerShell with “Run as administrator” and executed Get-Volume, before and after inserting the disk:
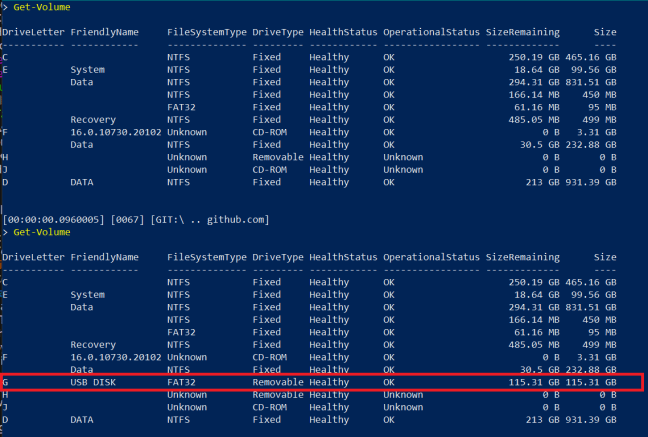
Now I know that it is the “G” drive (and it is already formatted, but we will continue).
I then run the following (only works for 8GB, or smaller drives; I had to use: http://www.ridgecrop.demon.co.uk/index.htm?guiformat.htm):
This file contains hidden or bidirectional Unicode text that may be interpreted or compiled differently than what appears below. To review, open the file in an editor that reveals hidden Unicode characters.
Learn more about bidirectional Unicode characters
| Format-Volume -DriveLetter G -FileSystem FAT32 -Full -Force | |
| New-Item -Path G:\ -Name 'TeslaCam' -Type Directory |
SOURCE (Model 3 Owners Manual, Page 72)
This can take a while to execute with larger volumes. Afterwards, eject the disk and insert it into one of the available USB ports in the car. If none are available, consider acquiring a splitter or a Jeda USB Hub for a Model 3; it provides two (2) USB-C ports and three (3) USB-A ports, with one being hidden within the hub, itself (the ideal location for the DashCam disk). Just know that these may be backordered; I have been waiting a few weeks.
Jeda USB Hub: https://getjeda.com/tesla-model3-usb-hub/
This allows for a wireless car charger and a couple of other devices while still operating the Sentry Mode.
After inserting the drive, navigate to: “Control” > “Safety & Security” > “Sentry Mode”:
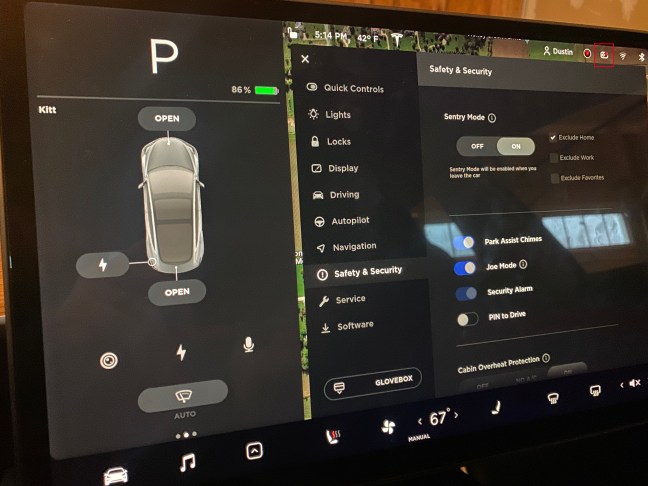
Or use any of these voice commands: “Keep Tesla safe”, “Keep my car safe”, “Sentry on”, or “Enable sentry”.
SOURCE (Model 3 Owners Manual, page 134)
